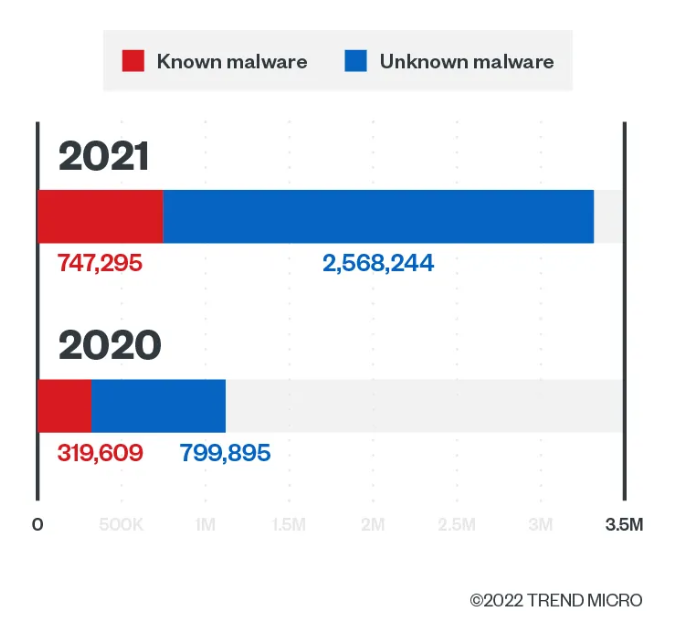
Based on a recent article from Trend Micro, email-based cyber threats were on a rise by 101% from 2020. But on the other hand ransomware attacks have been declining by 43% year-over-year which is positive news. While social engineering has become very popular tactic among scammers and attackers, traditional phishing and malware has still kept its place in a world of cyber attacks. Trend Micro’s Cloud App Security threat report 2021 also reveals that the phishing by spam email grew 596%. No, it’s not a typo and maybe your organization has also noticed an increase in spam emails, who knows?
Best time to protect your organization mailboxes and users was yesterday. The second best time is right now, so let’s take a look at one easy approach to securing those mailboxes with Preset Security Policies by Exchange Online Protection.
What are preset security policies in Exchange Online Protection?
Preset Security Policies were first launched in 2020. Think of preset security policies as pre-configured templates. Pre-configured by Microsoft. Understanding this is the key. Policies are not configurable by the customer and they are based on Microsoft’s experience and ideal configuration. These policies will configure spam, malware and phishing policies recommended by Microsoft.
There are three protection profiles
- Built-in protection
- Standard protection
- Strict protection
Built-in protection applies to Defender for Office 365 customers only. So you need to have paid licenses in order to have this level of protection on in your tenant. It enables Safe Links and Safe Attachments protections only and provides default policies for them.
Standard protection should be suitable for most users. It configures a set of Exchange Online Protection capabilities, Defender for Office 365 capabilities and impersonation protection policies.
Strict protection is same profile as Standard but settings are tuned to be more strict.
…but what is actually configured…?
No administrator likes to turn on a set of policies without knowing what those policies are.
- Exchange Online Protection
- Anti-spam policies
- Anti-malware policies
- Anti-phishing policies (spoofing)
- Defender for Office 365
- Anti-phishing policies: impersonation settings, spoof settings (same as EOP anti-phishing), advanced phishing thresholds
- Safe Links policies
- Safe Attachments policies
Great! Now you know what policies are being turned on. But you still don’t know what settings those policies will enforce upon your users. Don’t worry, Microsoft has an article about the recommended settings for EOP and Defender for Office 365. Brace yourself, it’s a looong one.
One more thing you should know about: Order of precedence
At first everything seems like a ‘easy-peasy-lemon-squeezy‘, but then the other administrator did some tweaking of profiles when you had to leave early for your daughters basketball game and there’s user that has more then one profile assigned to them. And next morning there’s a ticket assigned to you to check the email policies that are assigned to this user. No problem! The order of precedence will reveal what policy is applied to the user.
When there are multiple policies assigned to a user from multiple profiles the policies from highest priority profile will determine the policy setting for that user. The order of profiles starting from highest are:
- Strict protection
- Standard protection
- Custom security policies
- Built-in protection
When should you use preset security policies?
If you don’t have a security department or your dedicated security engineer is swamped with other security backlog work then using preset security policies makes a lot of sense. This is because the configuration is managed by Microsoft. The whole birth of these policies actually arise from Microsoft detecting and estimating that around 20% of their customers were using poorly configured and potentially high risk policies.
I could also see this being good for start ups that are busy with other work than their security posture. Or organizations whose industry does not pose any exotic cyber security regulations. In these situations preset security policies are your friend and a easy win. Managed service providers could use preset security policies as a security baseline for incoming customers in a similar fashion that Azure AD has Security Defaults. There are definitely more use cases for deploying preset security policies and every situation is one of a kind.
In a nutshell it’s a trade-off between losing control over the policy settings but gaining Microsoft recommend configuration with ease.
Requirements for using preset security policies
Obviously, some of the policies are paid features of Microsoft Defender for Office 365 plans or some add-on plans like Microsoft 365 E5 Security. These license bundles change over time so much that there’s no point for me to try and list them here. Do your own research to make sure your software plans cover the usage of all the features or you cannot fully utilize the benefits of these preset policies.
In order to deploy preset security policies you need to have Security Administrator role or be a member of the Organization Management group.
How to enable?
You can enable preset security policies from Microsoft 365 Defender portal. There does not seem to be a single PowerShell command that one could use to turn on Standard or Strict profile but you can write an automation script to include all the different policies that make up the preset profile and look up the values for the settings from the above mentioned recommended settings article.
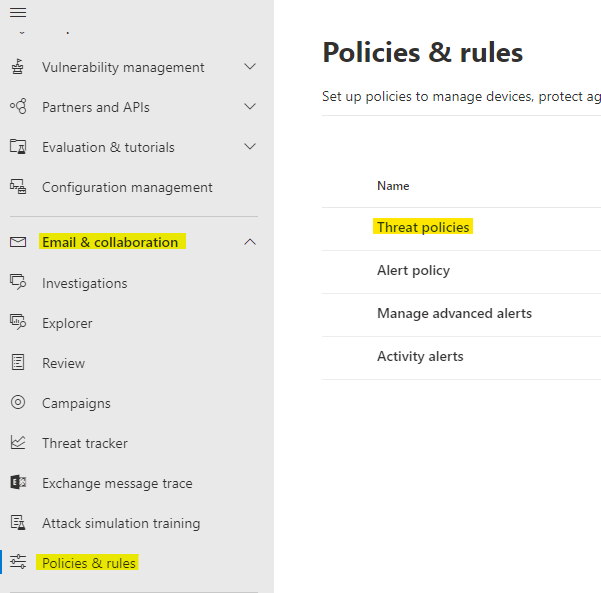
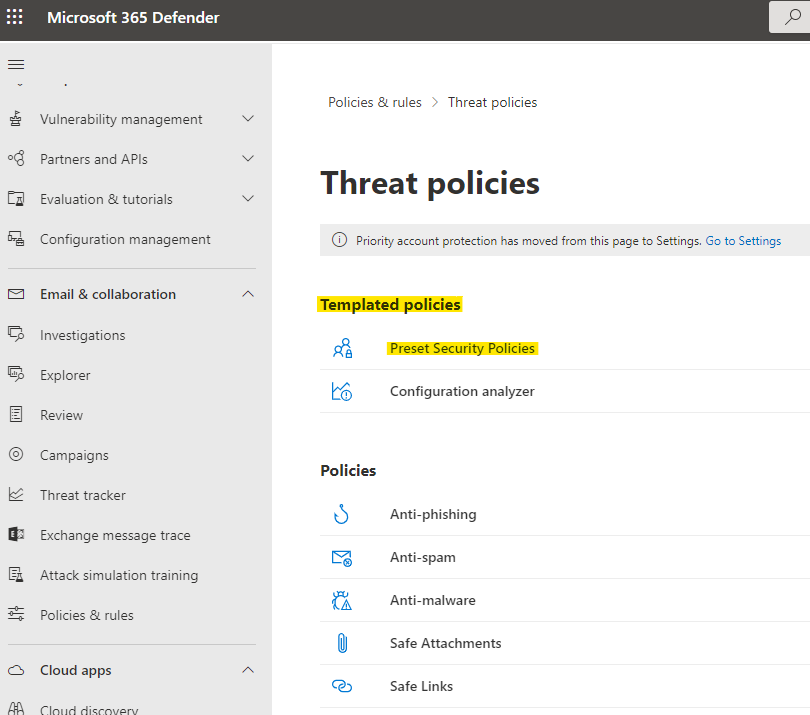
- Go to Microsoft 365 Defender portal (https://security.microsoft.com)
- Email & Collaboration > Policies & rules > Threat policies
- From Templated policies > Preset Security Policies
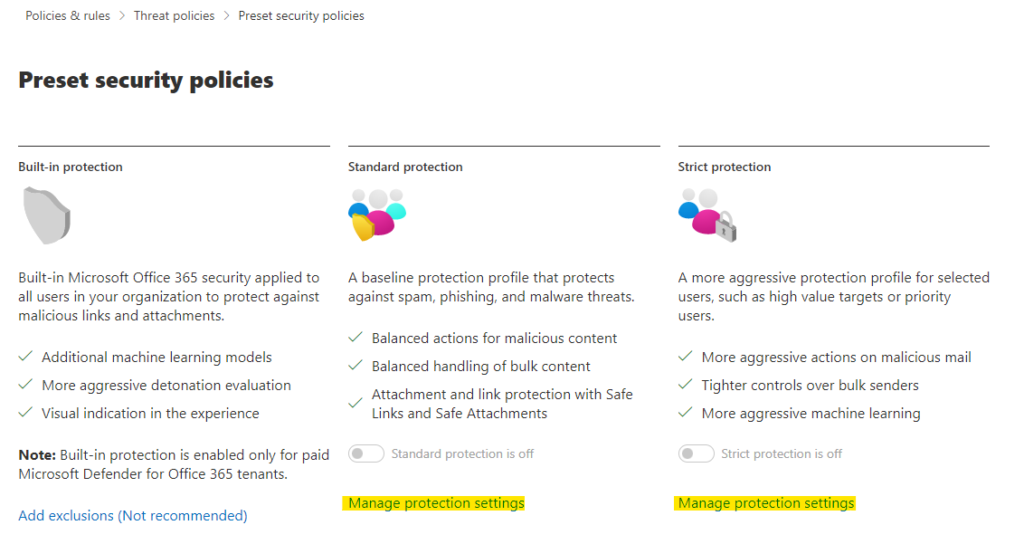
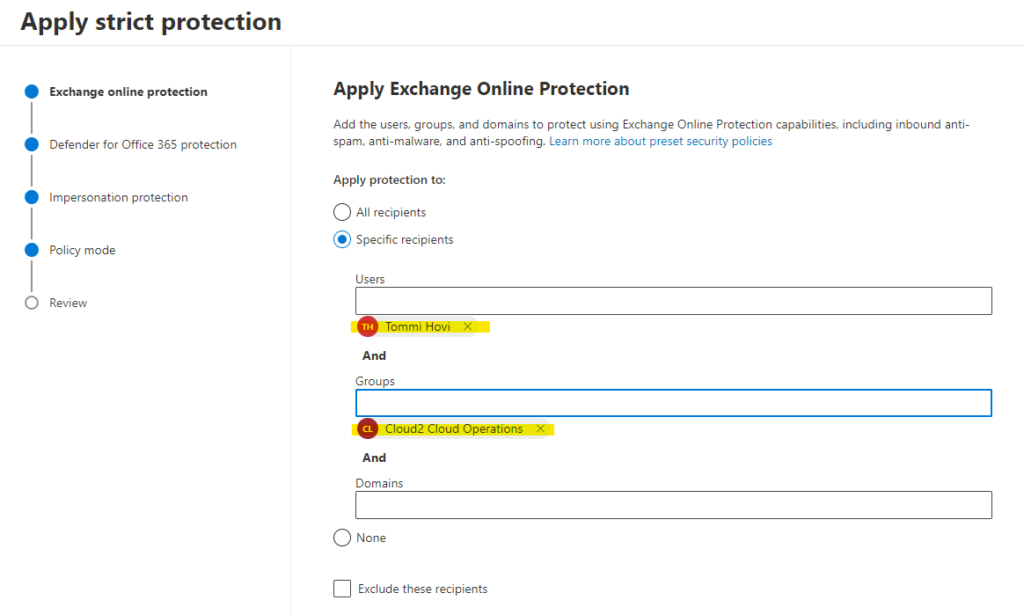
Turning these profiles on is quite intuitive and both Standard and Strict are identical to configure. Click the ‘Manage protection settings’ and follow the wizard. If you have necessary licenses in your tenant you’ll see steps to configure MDO protection and impersonation protection.
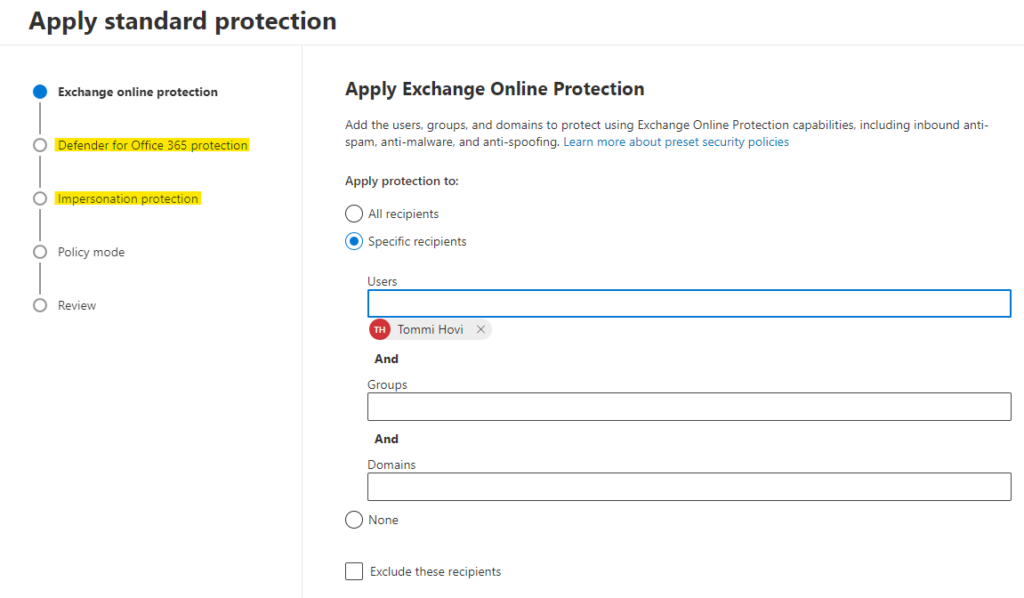
You’ll need to understand that the form includes And operators. In the following rule applies to my account only if I’m also a member of Cloud2 Cloud Operations group. Otherwise conditions are not met and this EOP protection won’t apply to my account. When excluding users it’s the same thing. Exclusions only apply if all the conditions that are joined by the And operator are met.
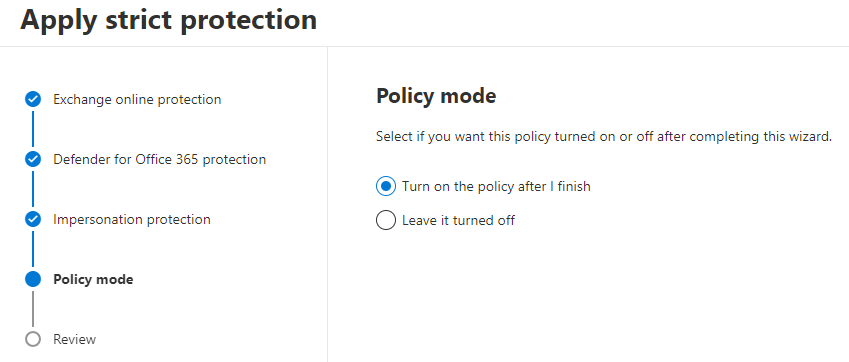
Finally, there is an option to leave the pre-configured policy off after creation. This comes in handy if you want to do the configuring of the profile and apply it later (during the late night service break), or have someone else who’s on shift to just turn it on at scheduled time.
You should put some thought into who are the critical users or high value targets in your organization and see if the Strict profile would be an option for them. But as always, remember to create test users and assign these profiles to them first, play around with them as long as you need to feel confident that you know what to expect when you finally turn those policy setting on for real users.
Summary
Preset Security Policies are a great way to protect your organizations mailboxes from the most common threat vector of these times – email. As time goes by and new features are introduced Microsoft will keep those settings populated with recommended values. Same goes for existing settings if their recommended value gets updated. You don’t need to feel guilty for not reviewing the settings every month.
Stay secure!
